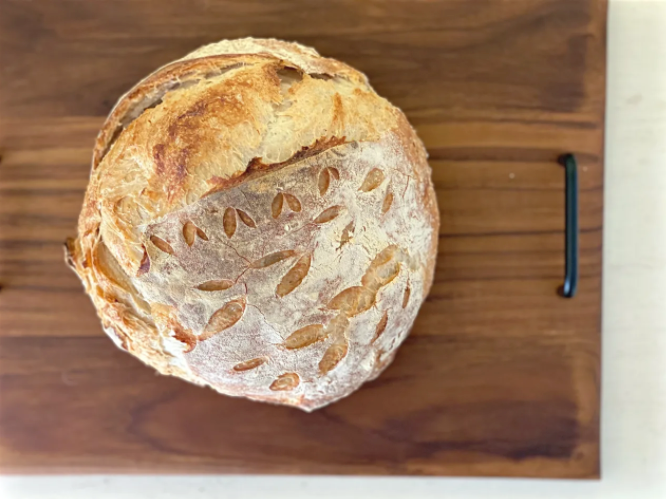
gluten-free sourdough recipe
Share
This is easy. This is so much easier than "regular" sourdough.
Gluten is a protein that is found and bound in wheat products. It is like the hands that hold the bread together, the bounce in your pizza crust and what makes your brownies fluffy.
In GF flour, you ditch the traditional flours, you lost the bounce. This means you have to adjust your traditional baking steps.
What I mean by easier is mostly surrounding the fact you don't have to bother the dough as much. We won't be stratchng and folding this GF dough because, well you can't. Those stretchy fibers are not there in gluten-free flour.
As usual, we are just going to get to it and give the recipe. No nonsense here.
Be sure your GF starter is fed and ready to rock. (We do sell a dehydrated form or you could make your own!) But for best results- feed it one-two days before making your dough! See, I am already throwing you off.
ingredients:
- 200 grams of un-fed GF starter
- 420 grams of Bob's Red Mill 1:1 GF flour (this is what we use)
- 300 grams of room temperature water
- 12 grams or so of sea salt (I don't really measure this, but maybe don't follow my lead here at first)
day one:
Mix your dough on day one. Leave it alone for 8-10 hours. I suggest starting this in the morning and coming back to it around dinner time. Your dough is going to double in size, but if you are used to traditional SD bred, it won't look the same so don't worry if it doesnt overflow your bowl. It won't, but you should see some activity there and an increase in size. This is considered your bulk ferment.
After the bulk fermentation, put your bowl in the fridge. That's it for now. Notice we haven't folded or stretched or done a dang thing to it yet.
day two:
It should be about the same time your started your dough, so its been close to a full day. Don't you dare panic if its been a few hours more or less. Try to get out of the habit of being SO damn strict with this. Have fun. Experiment.
Preheat your oven to 450. Some folks are in the habit of pre-heating the dutch oven or cloche- we don't but if you do, this is when you would be doing that.
Grab your dough from the fridge, and lightly flour a clean surface. Shape the dough into a tight ball, think of how you would do for a pie crust or a giant cookie ball. You are not folding, or building tension like you would with traditional bread. Just try to shape the dough into a ball. Cover the whole dough ball with a coating of flour.
Dust the dutch oven with flour or use parchment paper. Place the tightly shaped dough ball into your baking vessel and score it. The key here is the dough is still pretty cold from the fridge.
Bake for about 40 minutes covered and then another 25 or so uncovered. Ovens will vary, and I have played around with longer/shorter bake times. The internal temperature of your bread should read at least 210 degrees once it is done.
Let is cool and then enjoy!
We are not GF and we very much enjoy this bread recipe!
8 comments
So make your dough from a peaked starter, or a hungry starter?
Hi there! I bought your gf sourdough starter and have now made 4 loaves with it. My first 2 loaves I followed the cook time exactly and they were both raw/doughy on the inside. Loaf #3 I upped the 40 minutes to 60 and then did 20 uncovered and the inside was cooked a little bit more but still not done. My 4th loaf I did 70 minutes covered/20 minutes uncovered. It’s better but still not fully cooked. I’m using a lodge cast iron Dutch oven. Any idea on what else I can try? I can keep raising the cook time. Just wanted to check and see if you had any tips or maybe that’s just how the gluten free sourdough is?
I appreciate whatever help/advice you have.
Hi, can you share the GF starter process/ratios? I’m going to make my own but curious if you stick with a 1:1:1 ratio as you might a typical starter.
Thx!
Larkin