easy sourdough loaf recipe
Share
Ill say it again you all, sourdough is not scary. Or it doesnt have to be. I am here to help.
Even the non-baker can make this and wow their friends and family.
Lets dive in. We have gone over how to make your starter. Are you with me? If not, go check out that blog and catch up with me in a week.
This sourdough recipe uses a leaven- which is a fancy word for a substance that makes dough rise. Don't worry, you don't need anything special. Still just need your flour and water. You will however use *bread flour for your leaven, so grab some of that.
One day BEFORE we bake this loaf you will want to make your leaven. You will be using some of the starter we just made this past week OR some of your starter you have been keeping alive, or even the starter you are reviving from the fridge. If the latter is the case, make sure you feed it before.
You have your active starter, now lets make the leaven.
Leaven:
One tablespoon of your active starter, 1/2 cup bread flour, 1/3 cup warm water. Stir well and place it somewhere warm (just like we did with our starter) and leave it alone. I do this usually in the morning and let it rise all day, or at night and let it rise overnight. Either way, I leave mine alone for about 12 hours. It will be thick when you stir it, thats okay. Over the 12 or so hours, you should see it double and you will see bubbles. Now, its ready to use!
Making your dough for baking:
This recipe will yield 2 normal size loafs! Adjust as needed.
Grab a bigger mixing bowl, remember non-reactive. Grab your all-purpose flour, salt, and measuring cups for water/flour.
2-1/4 cups warm-is water goes in the mixing bowl first. Then add your leaven we made, the entire contents. Your leaven should float in the water! Then add 5 cups of flour.
Mix, Mix, Mix. Your dough will be shaggy looking and sticky feeling. I like to bake based on how it looks, but also how it feels. You might need to add a dash of water and/or flour to your mix. THATS OKAY. No worries.
Once the dough is mixed well, its sticky and shaggy. Leave it alone. Just walk away for about 30 minutes. When you come back to it, it won't look any different but this is when you are going to "fold" the dough for the first time. You don't want to stir the dough anymore, you want to scoop up the sides of the dough and fold it to the middle. Do this in a circle once all portions are folded and leave it alone.
I do the very same folding about 3-4 times. Each about 30 minutes or so apart. Again, this seems so daunting, but don't make it. If you fold 2 times, it will be okay. If you wait 1 hour in-between, its okay. In one of my last folds I add my "pinch" of salt and fold it in.
This is an "all-day" thing, but not time consuming. You just kind of have to be around.
I will leave my dough alone now for 6-10 hours. Sometimes 4, sometimes 12. Again, don't be so strict with yourself. You will learn how it rises for you- based on the temperature of your home! During this stage I have divided the dough in two equal portions and its resting/proofing in bannetons. You DO NOT have to have these, they just make prettier loaves. You can use a non-reactive bowl!
Okay, we have left it alone for a significant period of time. The dough should be large, sometimes overflowing the banneton or bowl. Depending on how you want it to look- I have just flipped it right out of the banneton to bake, or I take it out of the bowl and shape into a ball. You can build tension on your counter and shape your loaf by pulling the dough near you in a circle motion. (I have a highlight on my Instagram of me doing this, Wildoakfarms)
Preheat your oven to 425 while you are getting the shape of your dough the way you like it. Remember, during this process you only want to FOLD. Don't punch down the dough, you just want to help it take shape. (Again, I have videos of myself doing this)
You are now at the step where you get to make those fun designs on the dough. There are many options and none is wrong, you just want to slash open the bread with a lame or sharp knife to help control the expansion of the loaf as it bakes!
I bake this loaf in my oven on 425 degrees F for about 40 minutes total in a bread cloche or a dutch oven. BUT you don't have to have one of those. You can use a casserole dish, you just want something with a lid. I bake the first 20 minutes with the lid ON, and then take it off for the second half.
*If baking in a cloche, I have adjusted this to taking the lid off for the last 5-10 minutes*
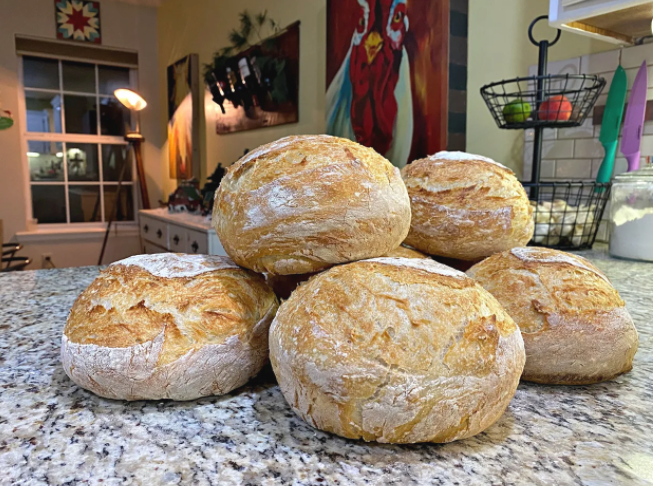
Times will vary depending on the oven type, so watch as you are testing out your first loaves. You are going for a thin, golden, crispy crust!
You got this! Always here to help.
Find me on the gram: Wildoakfarms.